 Bartr
Bartr1. Turn it on in Profile
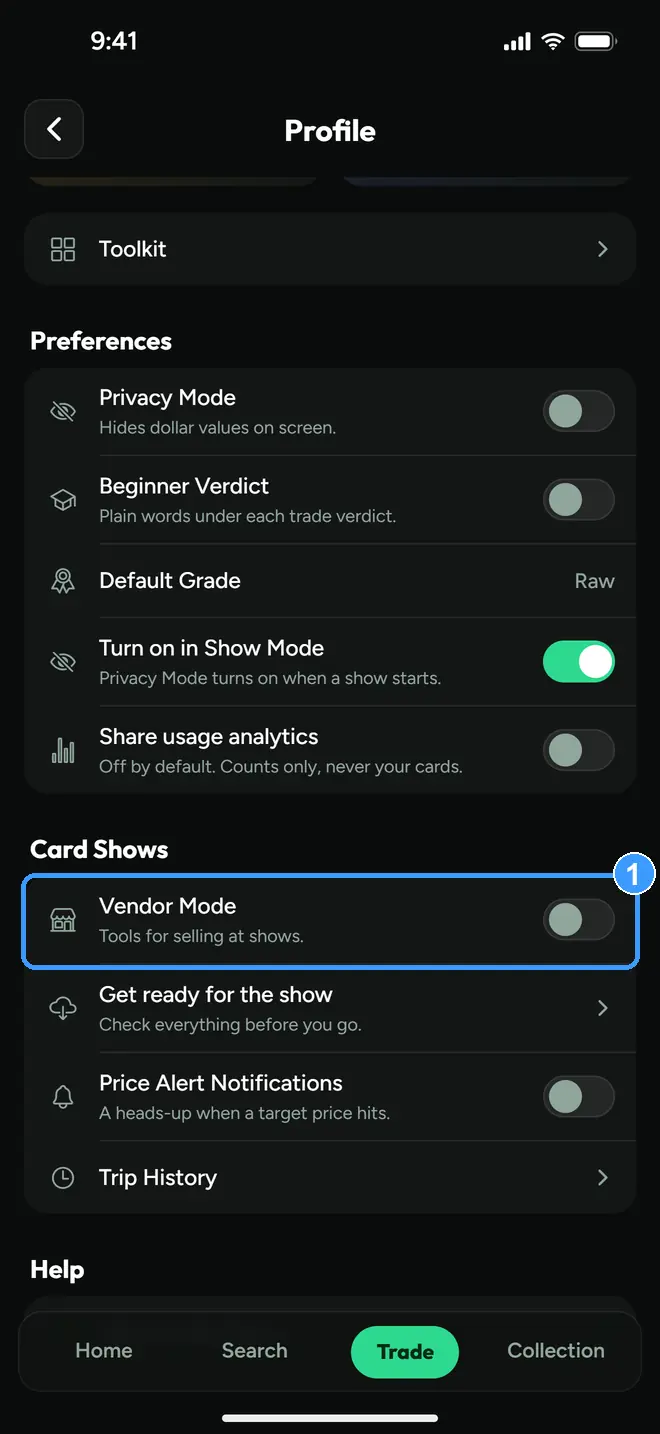
Vendor Mode starts off, unless you tap I sell at shows on the welcome screen. To turn it on or off later, go to Profile, then Settings, then Vendor Mode. (1)
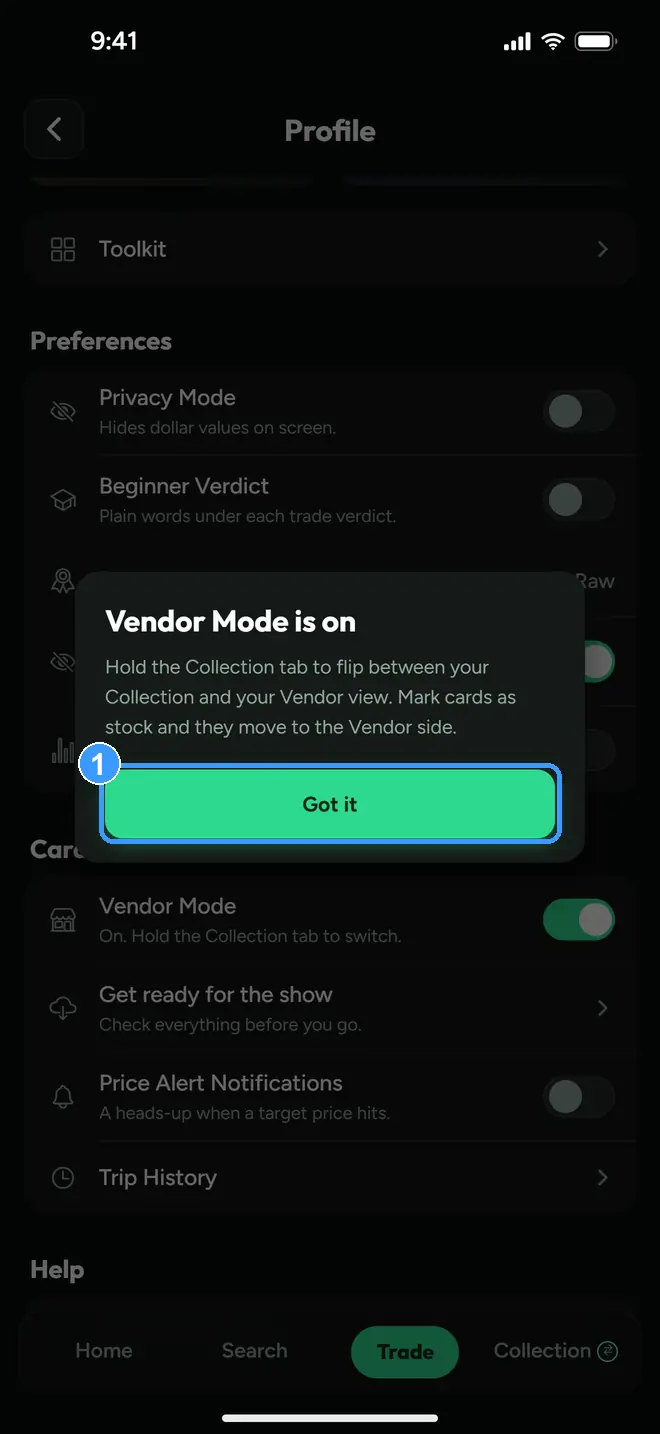
The app tells you how it works the moment it turns on: hold the Collection tab to switch between your Collection and your Vendor view, and cards you mark as stock move to the Vendor side. Tap Got it (1).
2. Switch to the Vendor Desk
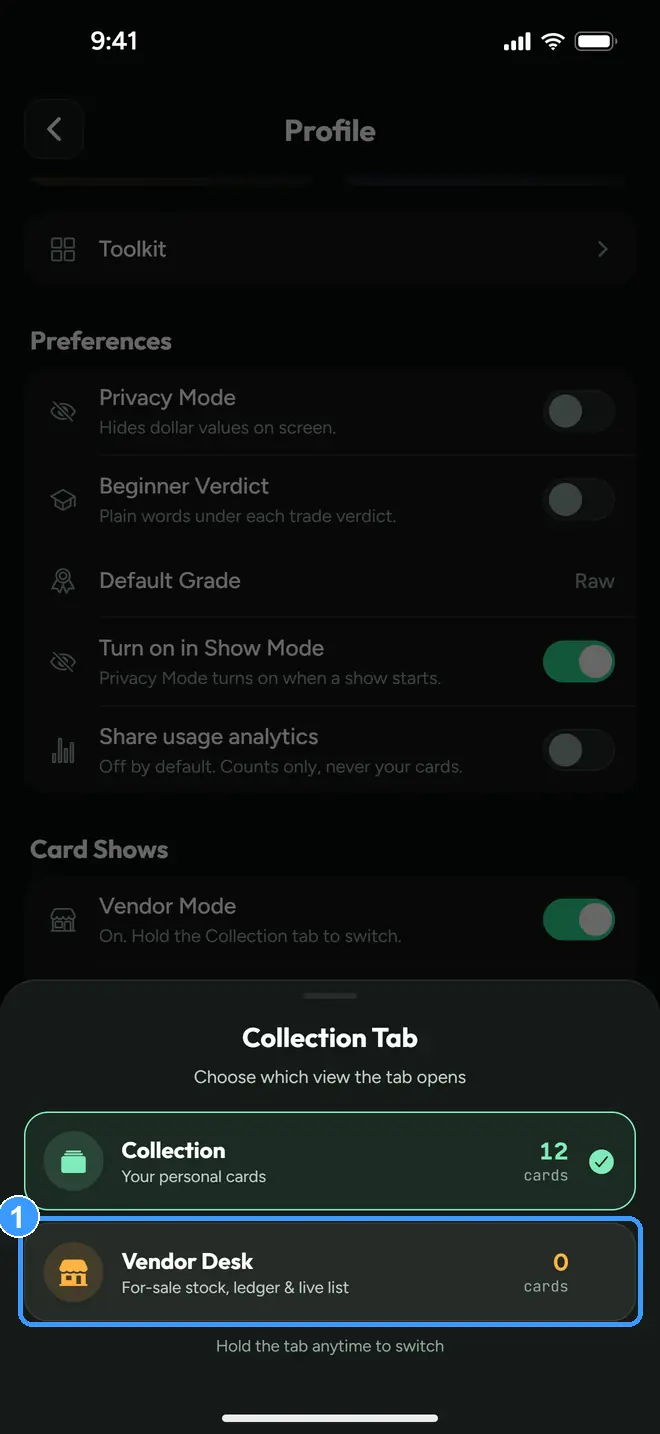
Press and hold the Collection tab. The chooser lists both views with live counts; tap Vendor Desk (1). Hold the tab anytime to switch back.
3. Stock your table
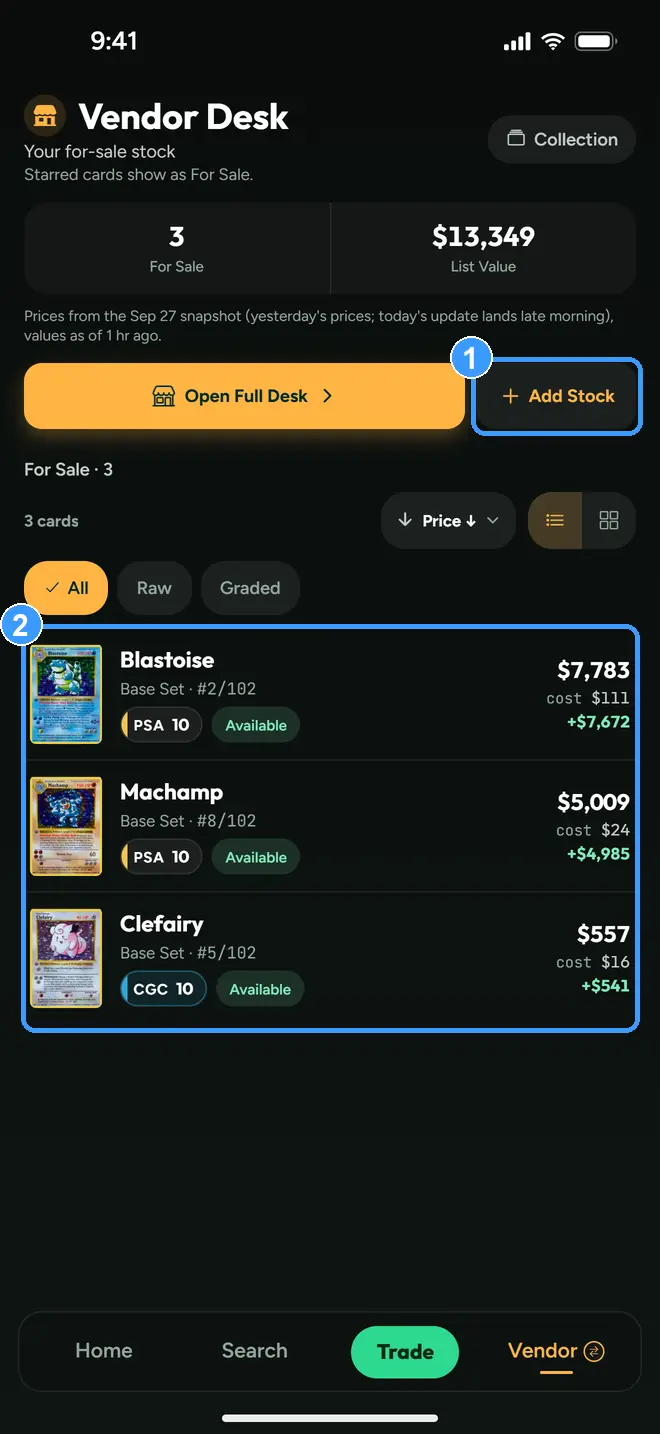
The desk shows what is for sale and its list value. Tap Add Stock (1) to pull cards in. Stock rows (2) carry the card, its grade, its price, what you paid, and its status; a card with no established price says No price instead of inventing one. Note the line under the totals: values come from the daily price snapshot and say which day they are from.
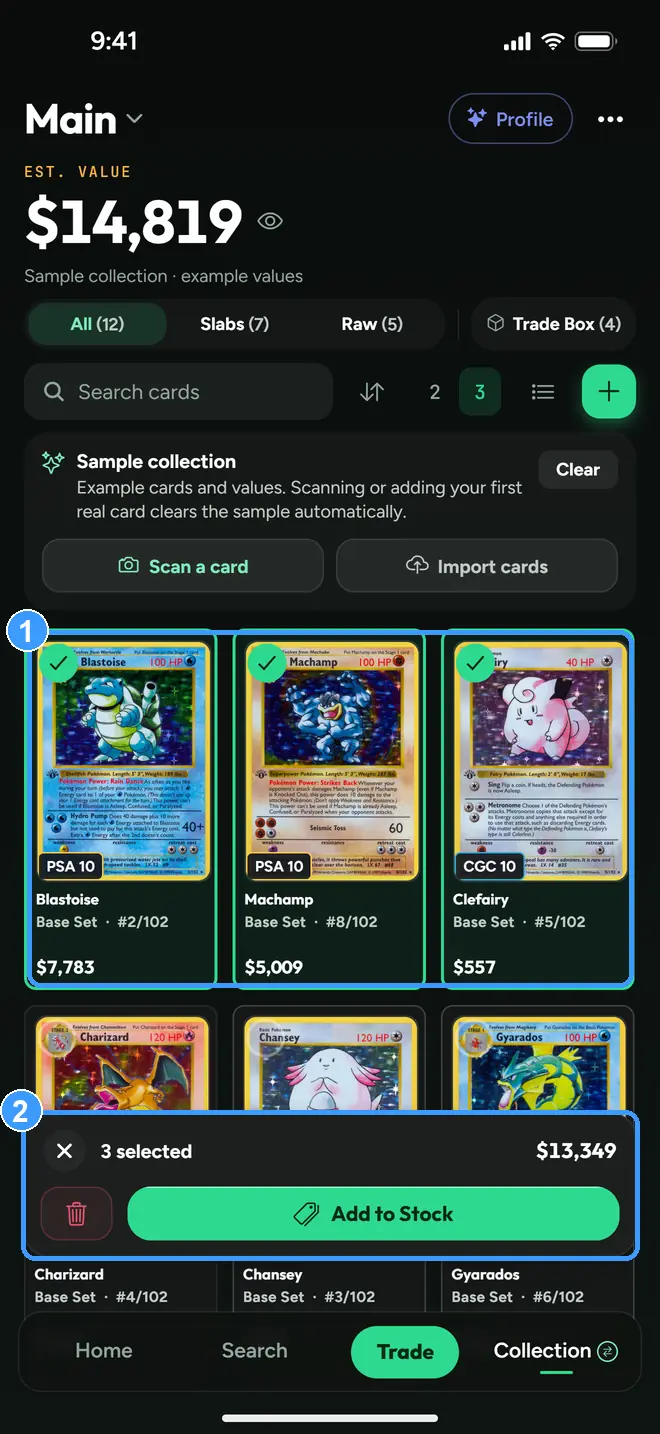
Picking stock is your own collection grid: tap the cards to sell (1), then Add to Stock (2). The bar keeps a running total of what you selected.
4. The full desk
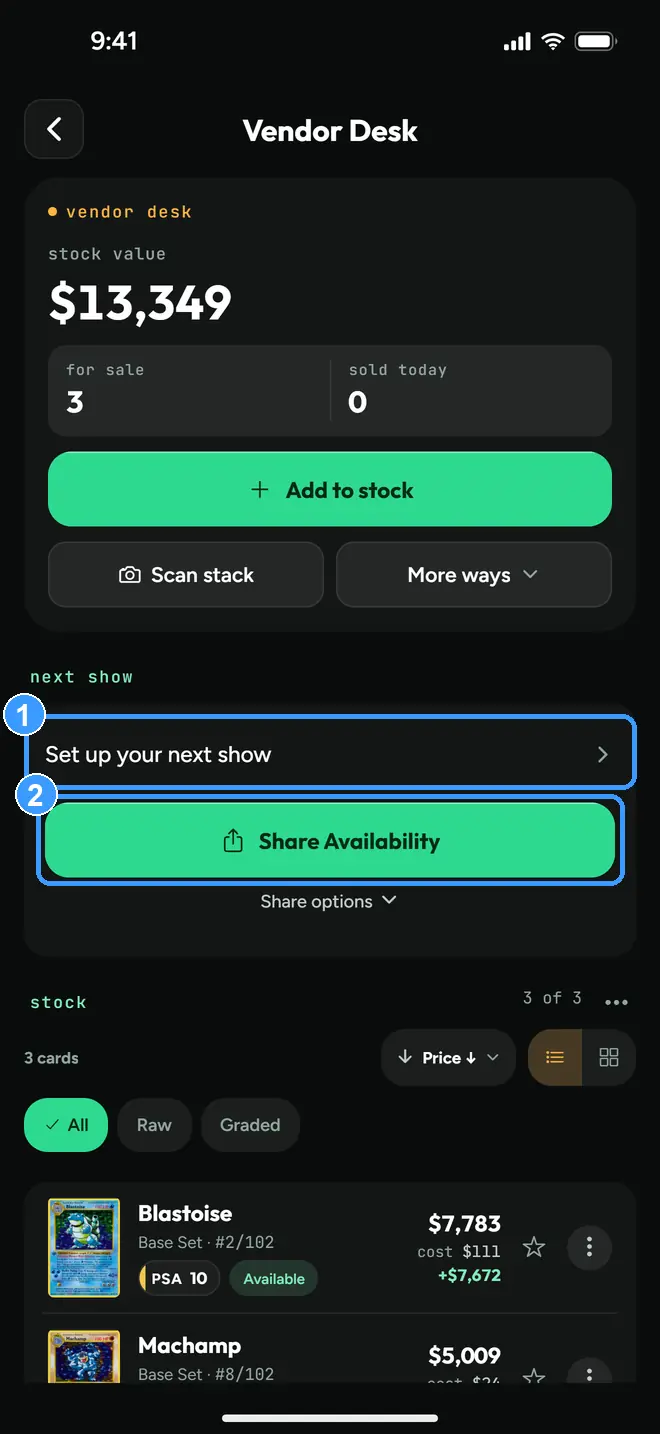
Open Full Desk gets the whole toolkit: set up your next show (1) so your desk and ledger are filed under it, Share Availability (2) to publish your list, and, further down, the Ledger, where every sale, buy, and trade you log at the table lands, totaled for the show and all time.
5. The live QR list
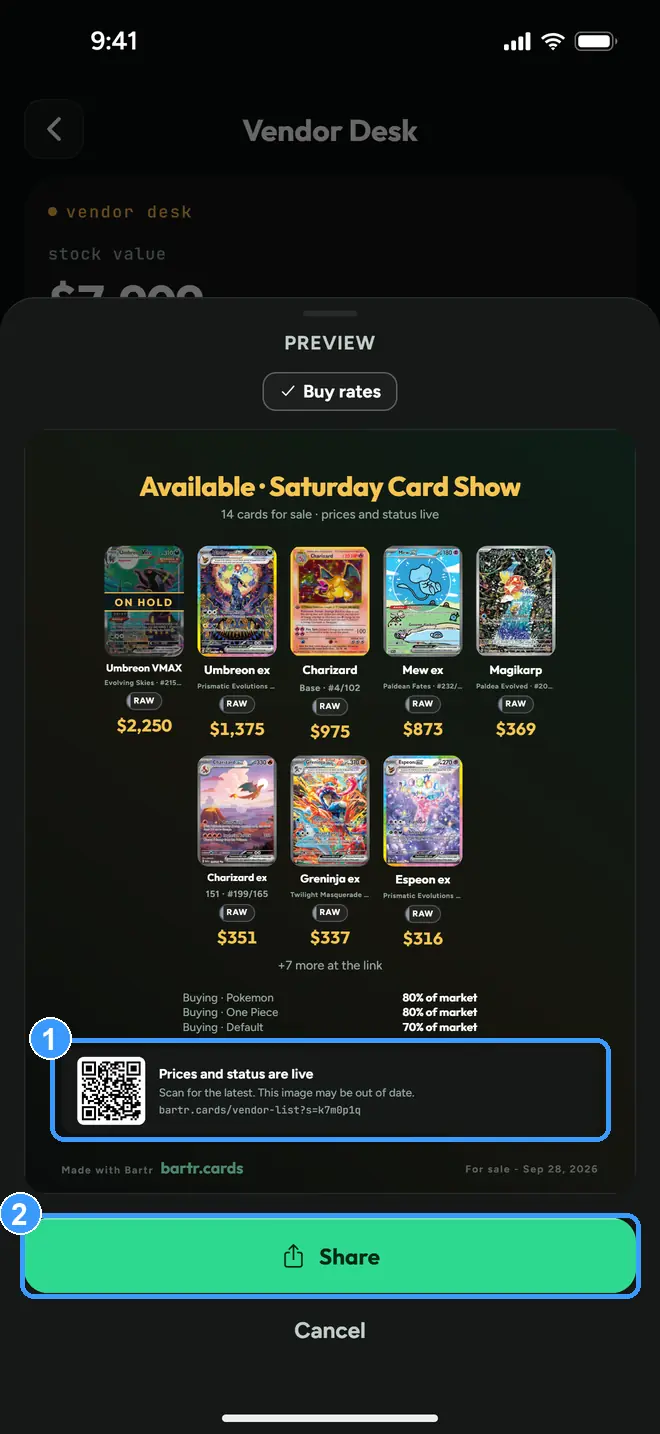
Share Availability builds a poster of your stock with a QR code (1). Customers scan it and get your live list in their browser: prices and sold status update as you sell, so the poster never goes stale even if the printout does. Tap Share (2) to publish and send it anywhere, or Cancel if you were just looking.
Every screenshot above comes straight from the app. Get the app to follow along on your own phone, or try the trade calculator in your browser first. Neither needs an account.